Force Transfer Receive - (User Guide)
link: https://dashboard.mcjimleather.com/modules/ftr
(Scan to be directed to the user guide documentation.)
Overview
Force Transfer Receive lets the Audit Team create the Transfer Receive (TR) for delivered Transfer Deliveries (TDs) when the store's promo and Area Supervisor have not created it themselves. It is the final step in the notice process: once the escalating notices have gone unanswered, Audit can step in and post the TR directly.
The module works as a short guided flow — you filter for the TDs you need, review and select them, set a document date, and create the TRs. A confirmation then lists the TR number generated for each TD.
What you can do here
• Find delivered TDs for any store, within a date range, that still need a TR.
• Review the TDs grouped by month, and expand any TD to see its items.
• Select one, several, or a whole month's TDs at once.
• Set the document date (the delivery / received date) for the TR.
• Force-create the TRs and see the TR number generated for each TD.
Who Can Use This Module
This module is intended for the Audit Team. Audit users can select any area and any store — there is no restriction to a particular area — since force-creating a TR is an audit action that may be needed for any store.
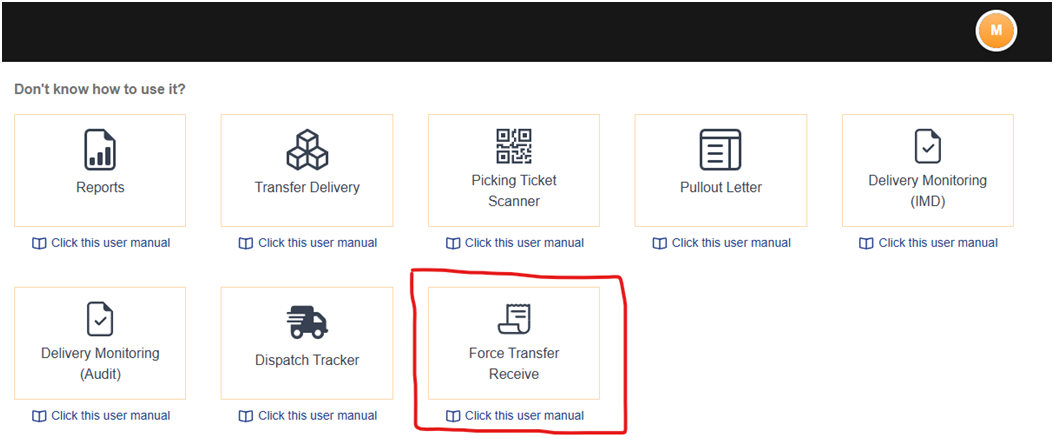
Access is granted by the MIS Department once the appropriate authorization is in place, after which Force Transfer Receive appears in the user's list of modules.
Key Terms
These abbreviations appear throughout the module.
|
Term |
Stands For |
Meaning |
|
TD |
Transfer Delivery |
The delivery document for the goods sent to the store. |
|
TR |
Transfer Receive |
What you create here once goods are received. A TR number is generated for each TD. |
|
Document date |
— |
The delivery / received date applied to the TR being created. |
How the Module Works
Force Transfer Receive is a three-step flow. You move forward through the steps, and can go back to change your filters at any time before creating the TR.
|
Step |
What happens |
|
1. Filter |
Choose a date range, area, and store to find the TDs available for TR creation. |
|
2. Review & select |
See the TDs grouped by month, expand any TD to check its items, and tick the ones to process. |
|
3. Set date & create |
Set the document date, then create the TRs. A confirmation lists the TR generated for each TD. |
Step 1 — Find the TDs
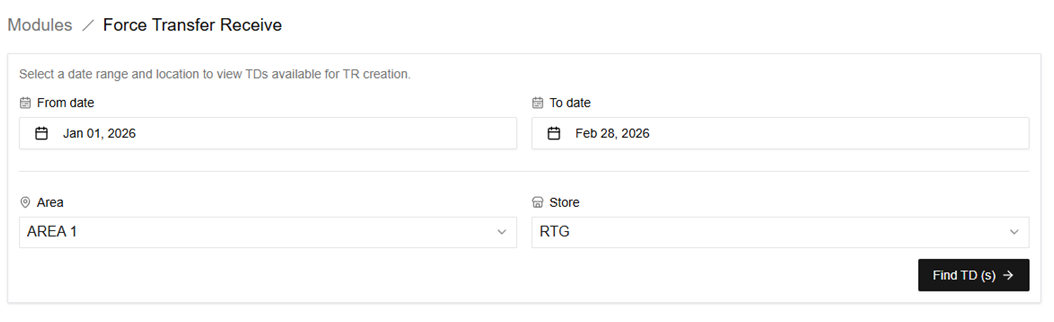
The first screen is where you tell the module which TDs to look for. Fill in all four fields:
• From date / To date — the date range to search within.
• Area — pick the area from the dropdown.
• Store — pick the store. This dropdown is enabled once you have chosen an area, and lists the stores in that area.
When a date range, area, and store are all set, the Find TD(s) button becomes active. Click it to load the matching TDs.
|
Choose the area first The Store dropdown stays disabled until an area is selected — it then shows only the stores in that area. If you change the area, the store selection resets. |
Step 2 — Review and Select TDs
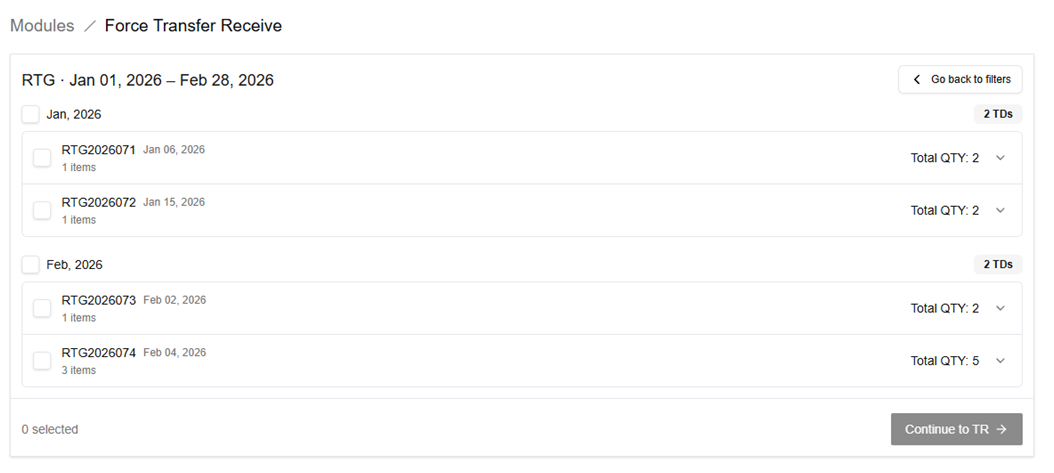
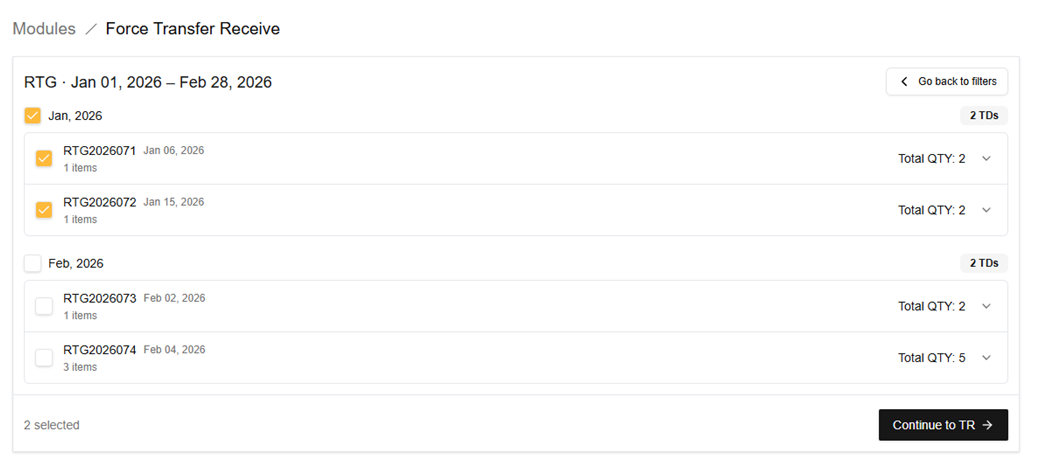
The review screen shows the TDs found for that store and date range. The store and date range appear at the top, and the TDs are grouped by month.
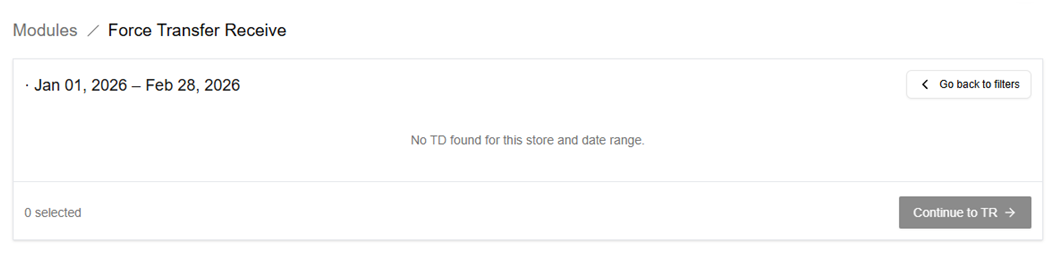
If nothing matches, a message says no TD was found for that store and date range.
Month groups
Each month has a heading with a checkbox and a count of how many TDs it contains. Use the month checkbox to select or deselect every TD in that month at once; it shows a partial (indeterminate) state when only some of the month's TDs are selected.
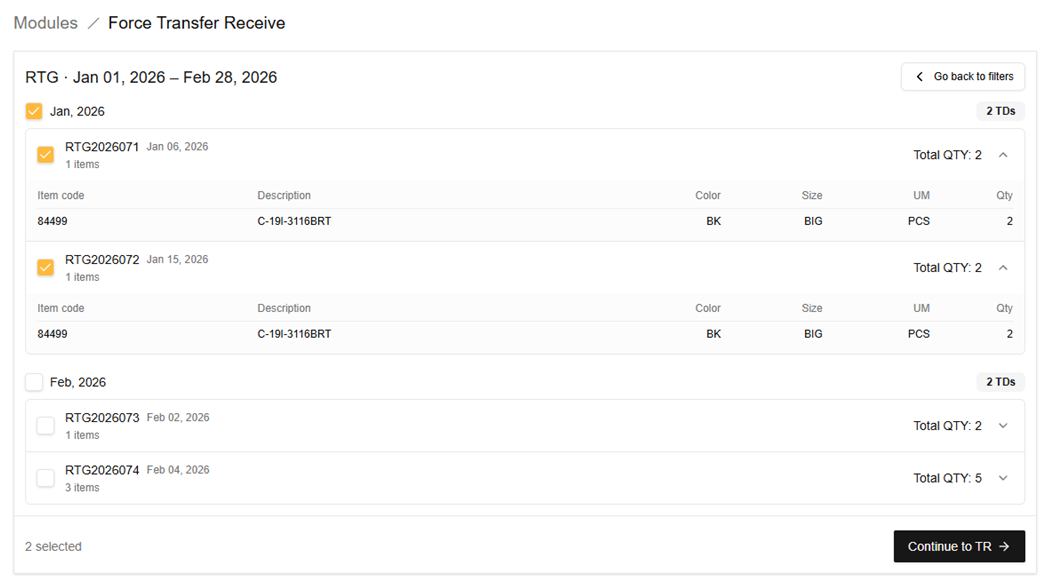
TD rows and items
Each TD row shows its number, date, item count, and total quantity, with a checkbox to include it. Click the arrow on the right to expand the row and see the items in that TD — item code, description, color, size, unit of measure (UM), and quantity.
Continuing
Step 3 — Set the Date and Create the TR
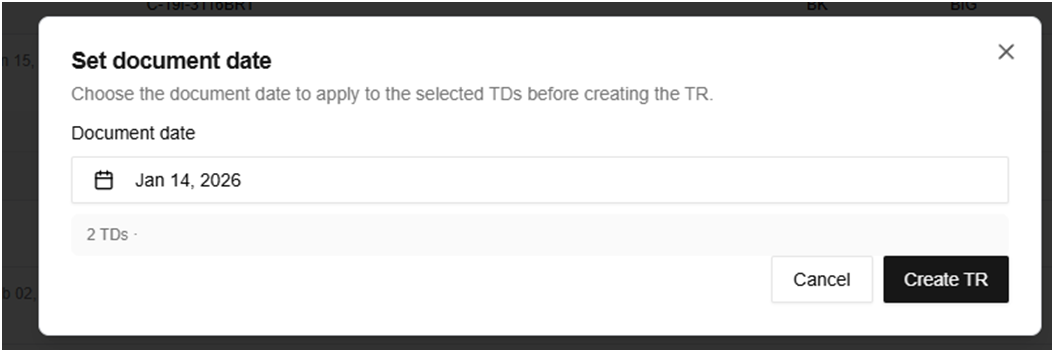
After clicking Continue to TR, a dialog opens where you set the document date for the TRs you are about to create.
1. Check the document date. It defaults to today; change it to the correct delivery / received date if needed.
2. Review the count of TDs shown in the dialog.
3. Click Create TR to post the TRs, or Cancel to go back without creating them.
|
Document date The document date is the delivery / received date that will be recorded on the TR. It defaults to today's date, so change it if the goods were received on a different day before you create the TR. |
Confirmation
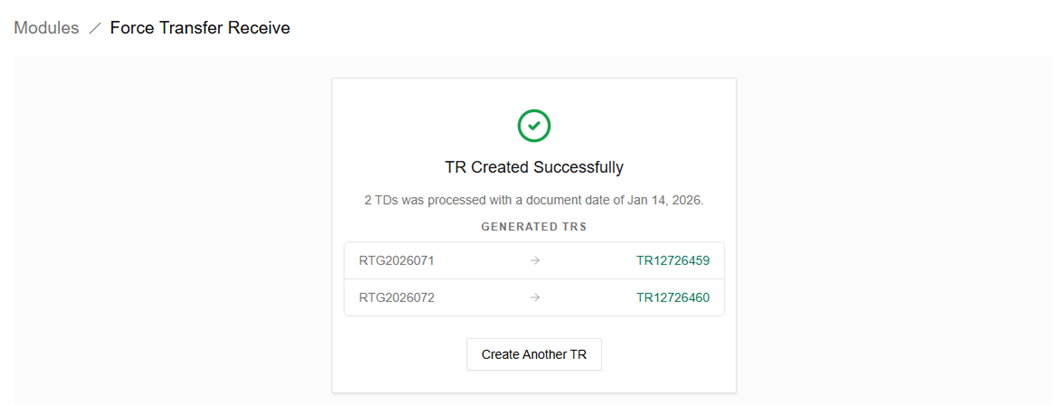
When the TRs are created, a success screen confirms how many TDs were processed and the document date used, and lists each TD together with the TR number generated for it. Click Create Another TR to start a new one from the filter screen.
Quick Reference
Typical flow
1. Set a From date, To date, area, and store, then click Find TD(s).
2. Review the TDs grouped by month; expand any TD to check its items.
3. Tick the TDs to process — individually or a whole month at once.
4. Click Continue to TR.
5. Set the document date and click Create TR.
6. Review the generated TR numbers on the confirmation screen.
|
At a glance Audit only — used to force-create a TR when the promo and Area Supervisor have not. Any store — choose the area first, then any store within it. Select by month — tick one TD, several, or a whole month at once. Document date — the delivery / received date; defaults to today. |