
Transfer Receive - (User Guide)
link: https://dashboard.mcjimleather.com/modules/tr
(Scan to be directed to the user guide documentation.)
Overview
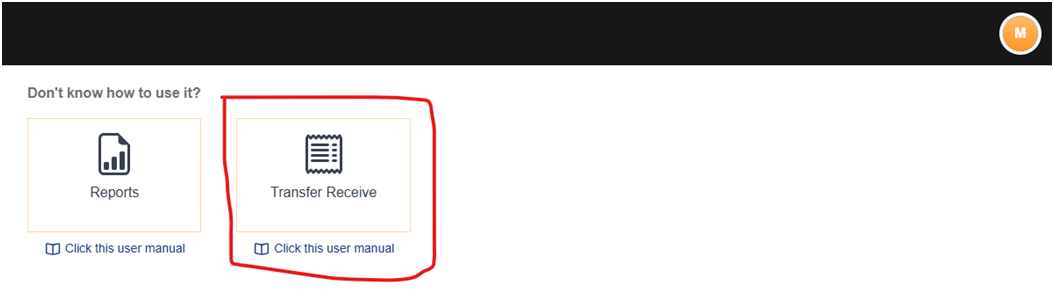
Transfer Receive is where the store's Promo or Area Supervisor creates the Transfer Receipt (TR) for goods that have been delivered. Each row is a delivery that is waiting for its TR. When the goods have arrived, you open the row, confirm the Transfer Delivery (TD) details, and either post the TR or record a reason for not processing it.
This module works together with the IMD notice system. If a TR is overdue, IMD sends an escalating SMS notice — first to the promo, then to the Area Supervisor. When you open this module, the rows that need attention show a notice button so you can create the TR directly.
What you can do here
• See every delivery that is waiting for a TR, with its current status and notice level.
• View the item breakdown (description, color, size, quantity) for a delivery.
• Create the TR for one or more TDs, with the date received.
• Decline to process a TR and record the reason.
• Attach supporting documents (required for Area Supervisors).
• Search, filter by status and date, and sort the list.
Who Can Use This Module
This module is used by two kinds of users, and each sees a slightly different form when creating a TR:
| User | What they do |
| Promo | Creates the TR for their store's delivered TDs. |
| Area Supervisor | Creates the TR on behalf of a store when the promo has not. Must upload at least one supporting document before submitting. |
Access is granted by the MIS Department once the appropriate authorization is in place, after which Transfer Receive appears in the user's list of modules.
What each user can see
The deliveries shown in the list depend on who is signed in:
• Area Supervisor — sees every store under their assigned area. Stores in areas not assigned to them are not shown.
• Promo — sees only their own store by default. If HR assigns a promo to additional stores, those stores also appear.
Key Terms
These abbreviations appear throughout the module.
|
Term |
Stands For |
Meaning |
|
TRQ |
Transfer Requisition |
The initial request that started the delivery. |
|
TPL |
Transfer Picklist |
The picklist generated from the requisition. |
|
TD |
Transfer Delivery |
The delivery document for the goods sent to the store. |
|
TR |
Transfer Receipt |
What you create here once goods are received. A TR number is generated for each TD. |
|
Pick Return |
— |
The goods were sent back or reversed before delivery. This is an end state — no TR is expected. |
The Main Screen
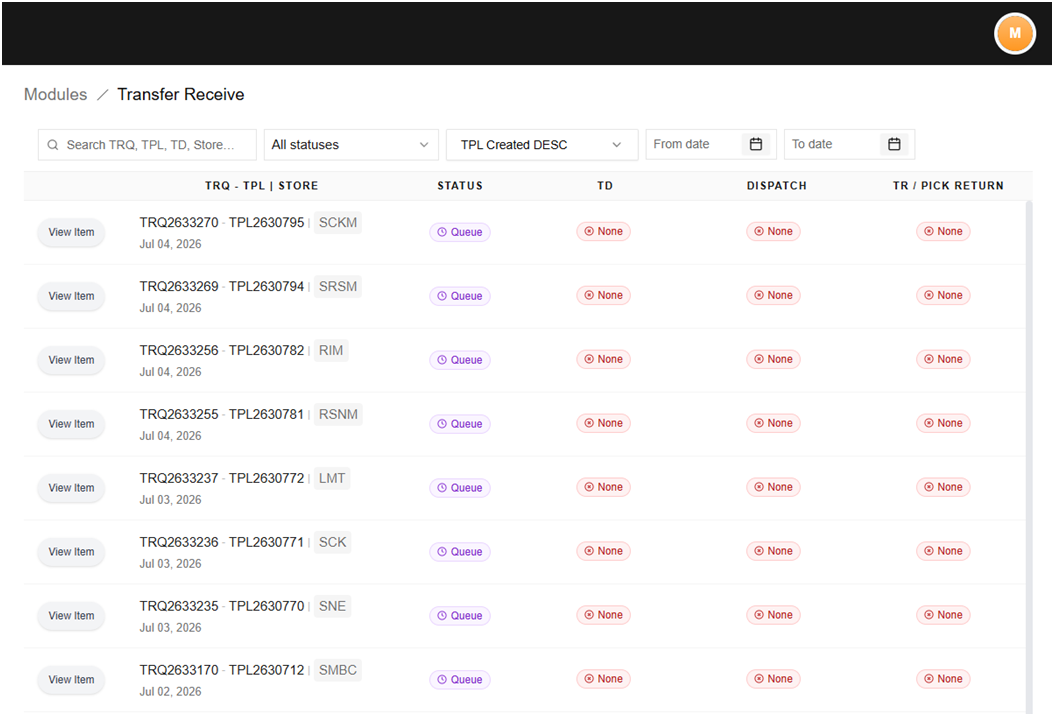
When you open Transfer Receive you see a table of deliveries waiting for a TR. Each row is one delivery, and the columns run left to right in roughly the order the delivery moves through the process.
Columns
|
Column |
What it shows |
|
View Item |
A button that opens the item breakdown for that delivery. |
|
TRQ – TPL | Store |
The Transfer Requisition and Transfer Picklist numbers, the store code, and the TPL date. |
|
Status |
The current stage of the delivery (see Section 5). |
|
TD |
The Transfer Delivery number and its date. |
|
Dispatch |
The dispatch timeline showing each delivery attempt and its result. |
|
TR / Pick Return |
The action area: a Create TR or notice button when a TR is due, or the final TR number / Pick Return once resolved. |

Viewing the items in a delivery
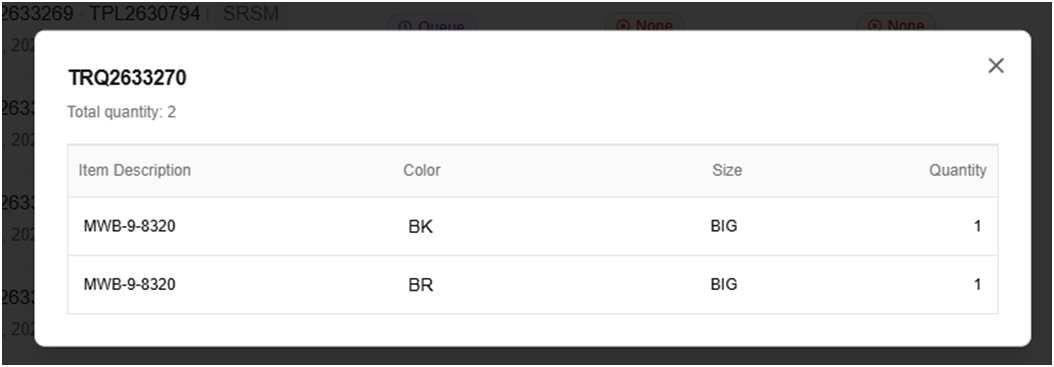
Click the View Item button on any row to open a window listing the items in that delivery — item description, color, size, and quantity — with the total quantity shown at the top. This lets you check what you are receiving before you create the TR.
Searching, filtering and sorting
The controls at the top of the screen help you find and organize deliveries:
• Search — search by TRQ, TPL, TD, or Store code.
• Status filter — show only deliveries in a chosen status, or “All statuses.”
• Sort — sort by TPL Created, ascending (ASC) or descending (DESC).
• From date / To date — limit the list to a date range.
• Clear — appears when any filter is active; removes all filters at once.
Filtering by status
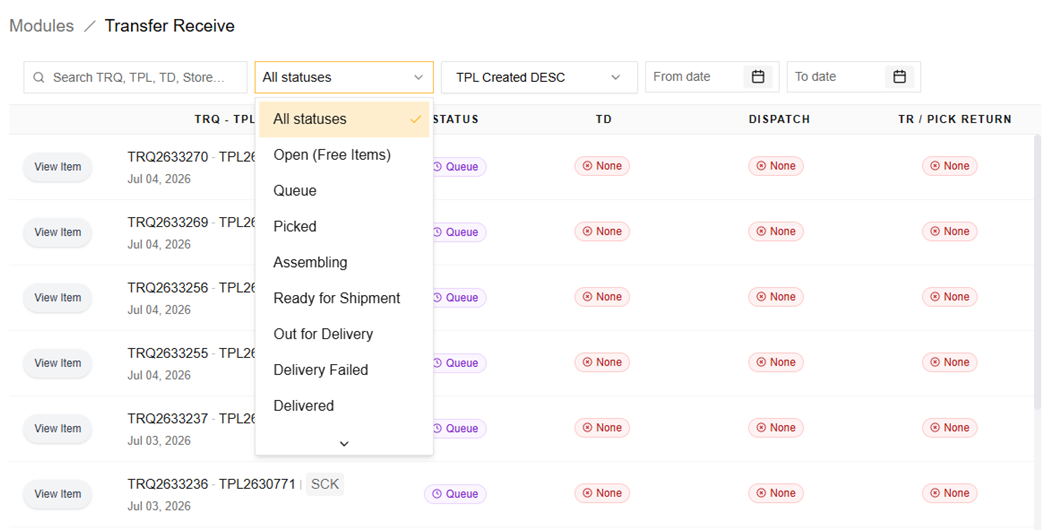
The status dropdown lets you show only the deliveries at a particular stage. Open it and pick a status — for example, choose Delivered to see only deliveries that have arrived and are waiting for a TR, or Declined by Promo to review the ones that were turned down. Only one status can be active at a time; choose “All statuses” to clear it and show every delivery again. The full list of statuses and what each means is in Section 6.
Sorting the list
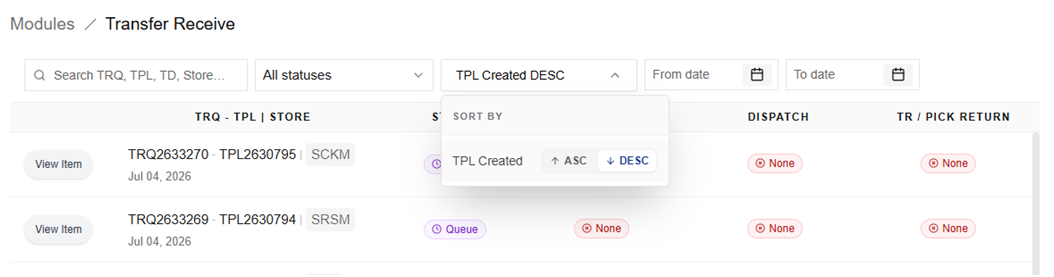
The Sort dropdown controls the order of the list. It sorts by TPL Created — the date the picklist was created — with an ASC / DESC toggle:
• DESC (descending) — newest first. This is the default, so the most recent deliveries are at the top.
• ASC (ascending) — oldest first, useful for clearing the longest-waiting deliveries.
The TR / Pick Return Column
The last column tells you whether a delivery still needs a TR and, if IMD has followed up, which notice level it has reached. All of the buttons below open the same Create TR form — the color and label simply reflect how urgent the request is.
|
What you see |
What it means |
|
Create TR (blue button) |
The goods are delivered and a TR is due. Click to open the Create TR form. |
|
First Notice (pink button) |
IMD's first reminder to the promo to create the TR. Click to create it. |
|
Second Notice (amber button) |
IMD's reminder to the Area Supervisor to coordinate or create the TR. Click to create it. |
|
Third Notice (red button) |
IMD's final notice for Audit review. Even at this stage the promo or Area Supervisor can still create the TR — click to create it. |
|
Pick Return |
The goods were sent back before delivery. No TR is expected. |
|
A green TR number |
The TR has already been created for this delivery. |
|
None |
No TR exists and the delivery is not yet at a stage where a TR applies. |







Delivery Statuses
The Status column tells you where a delivery currently stands. The statuses you may see are:

|
Status |
Meaning |
|
Queue |
The delivery is queued and has not yet been picked. |
|
Picked |
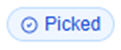
The items have been picked. |
|
Assembling |
The TD is on a checklist and is being assembled. |
|
Ready for Shipment |
A VDR exists; the delivery is ready to ship. |
|
Out for Delivery |
The delivery is on its way to the store. |
|
Delivered |
The goods have been delivered to the store. |
|
Delivery Failed |
A delivery attempt failed. |
|
Declined by Promo |
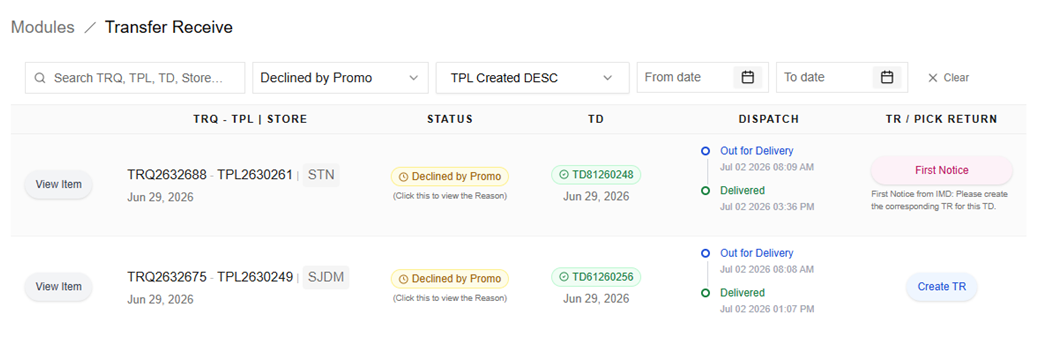
The promo declined to process the TR. Click the status to view the reason. |
|
Open (Free Items) |
The transfer is open for free items. |
|
Completed |
A TR has been created — the delivery is complete. |
|
Pick Return |
The goods were sent back or reversed before delivery. |
|
Cancelled |
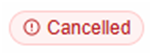
The delivery was cancelled. |
Creating a Transfer Receipt
Clicking Create TR (or any notice button) opens the Create TR form. The form is the same whichever button you used; the steps below walk through it.
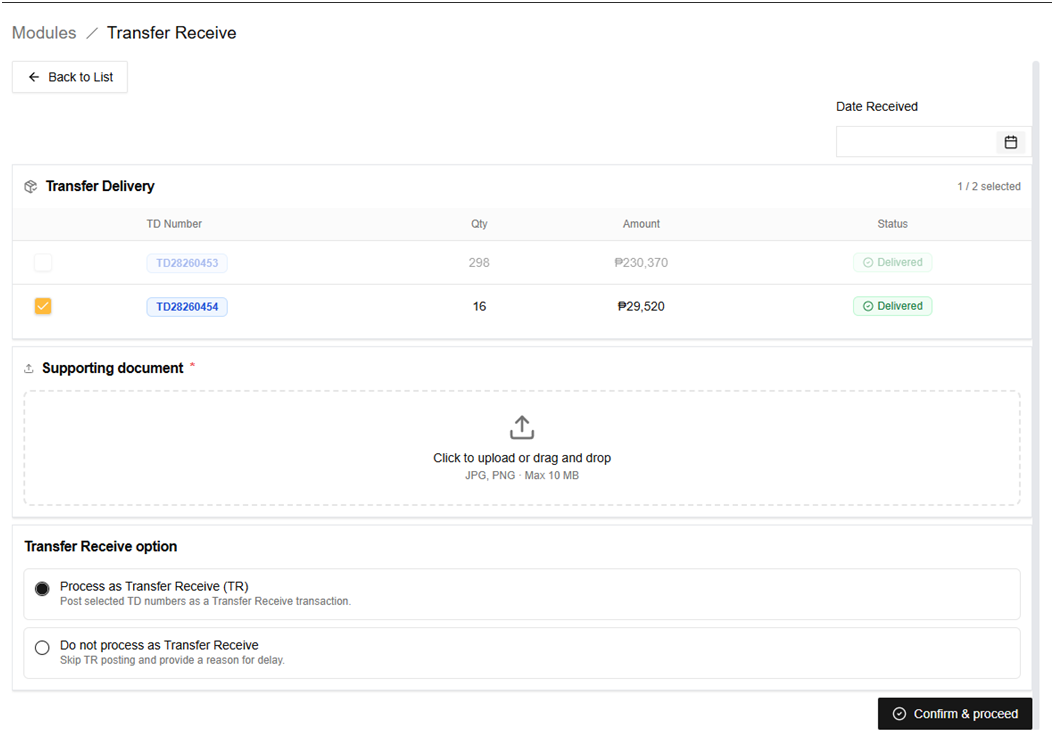
Step 1 — Date received
At the top right, pick the Date Received — the date the goods actually arrived at the store. This is required.
Step 2 — Select the TD numbers
The Transfer Delivery table lists the TDs for this delivery, each with its quantity, amount, and status. Tick the TDs you want to include in the TR; the counter at the top shows how many are selected. You must select at least one.
The TD you opened from the list is ticked for you by default. The other TDs shown belong to the same store and are also waiting for a TR — you can tick them here and create their TRs at the same time, so you don't have to open each one separately.

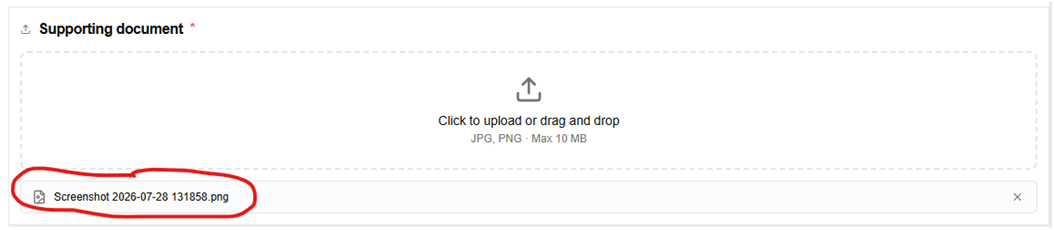
Step 3 — Attach a supporting document (Area Supervisors only)
The Supporting document card only appears for Area Supervisors, and for them at least one file is required. Click to upload or drag and drop — JPG or PNG, up to 10 MB each. Uploaded files are listed and can be removed before submitting. For promos this step is hidden entirely — promos do not upload a document.
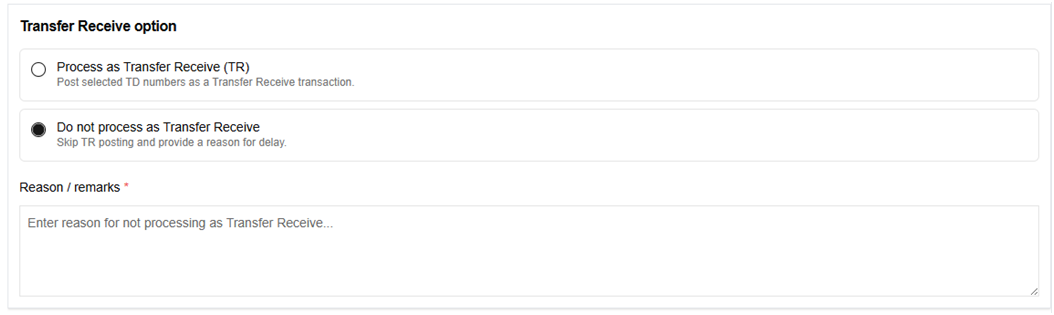
Step 4 — Choose the Transfer Receive option
In the Transfer Receive option card, choose one:
• Process as Transfer Receive (TR) — posts the selected TDs as a TR.
• Do not process as Transfer Receive — skips TR posting; a Reason / remarks box appears and is required.

Step 5 — Confirm
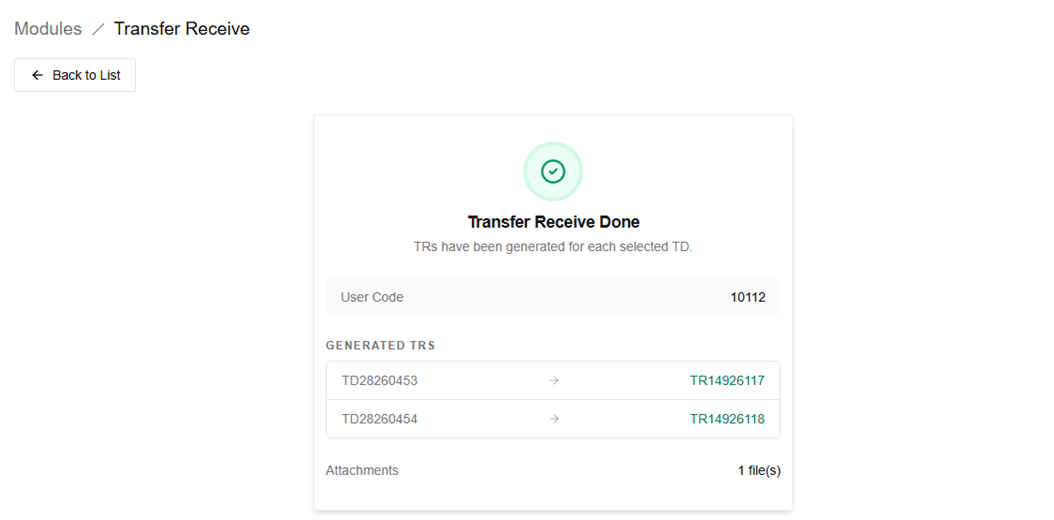
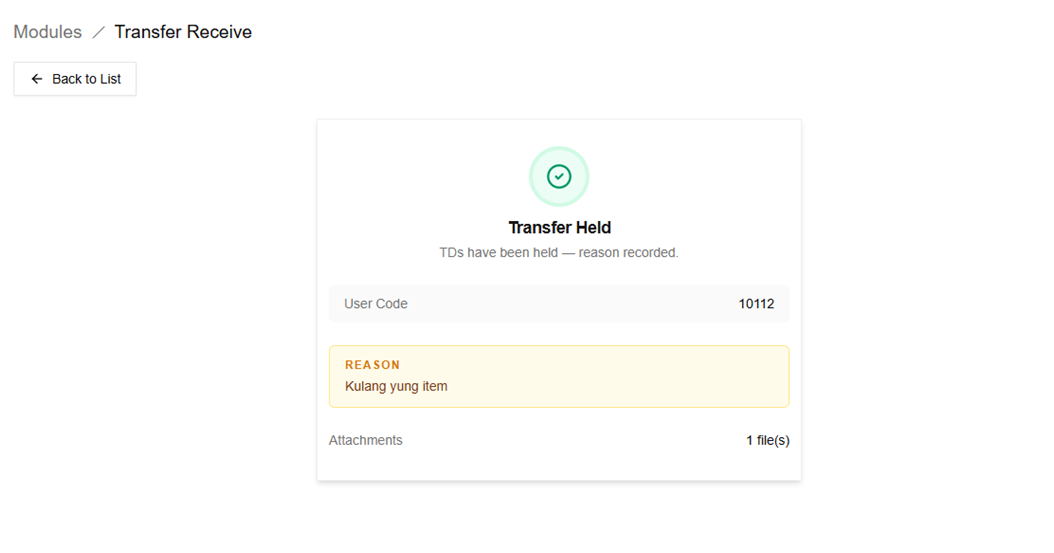
Click Confirm & proceed. If anything required is missing (no TD selected, no date, a supervisor with no document, or a missing reason), the form highlights what to fix. On success, a confirmation screen appears.
|
What the confirmation shows Transfer Receive Done — lists each selected TD and the TR number generated for it. Transfer Held — shown when you chose not to process; the reason you entered is recorded. |
Viewing Extra Details
Some cells on the main screen are clickable and open a window with more information.
Promo decline reason
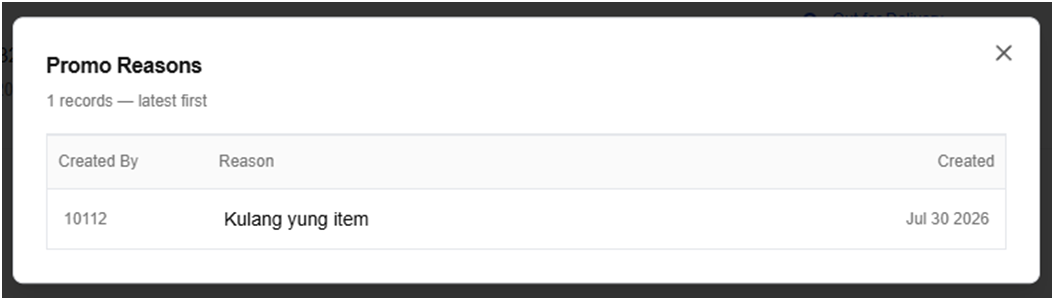
When a status shows “Declined by Promo,” click it to open the Promo Reasons window. It lists each reason the promo gave for not processing the TR, who entered it, and when — with the most recent reason shown first.
Delivery-attempt history
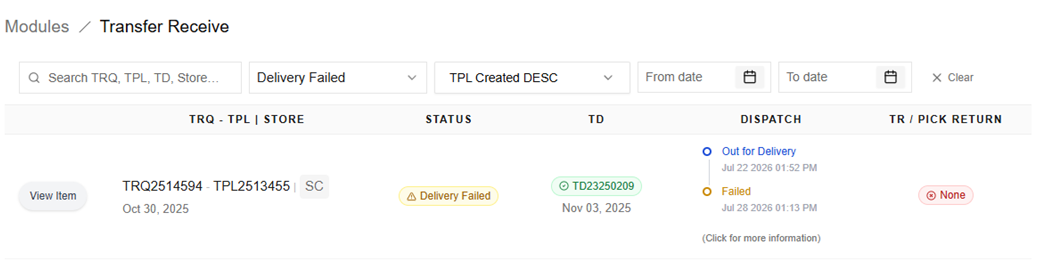
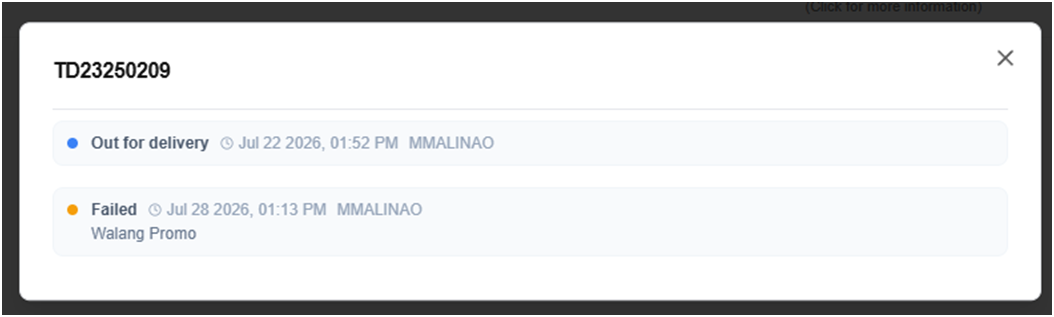
When a dispatch has a failed attempt, the dispatch timeline becomes clickable. Click it to open the delivery history, which shows each attempt, its result, the date and time, who recorded it, and any reason given.
Attached documents
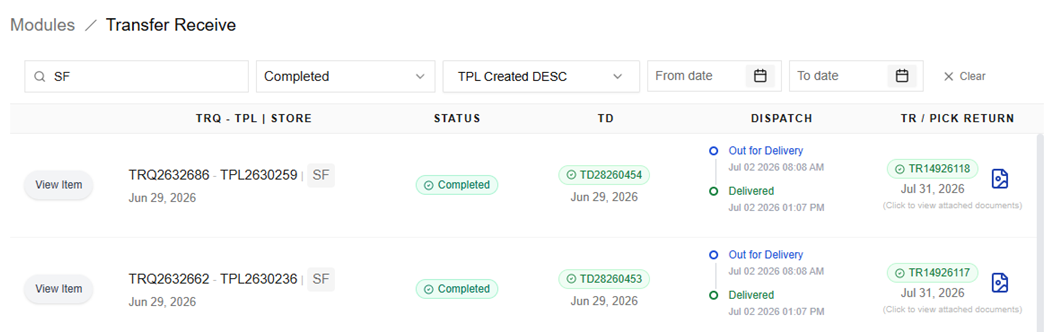
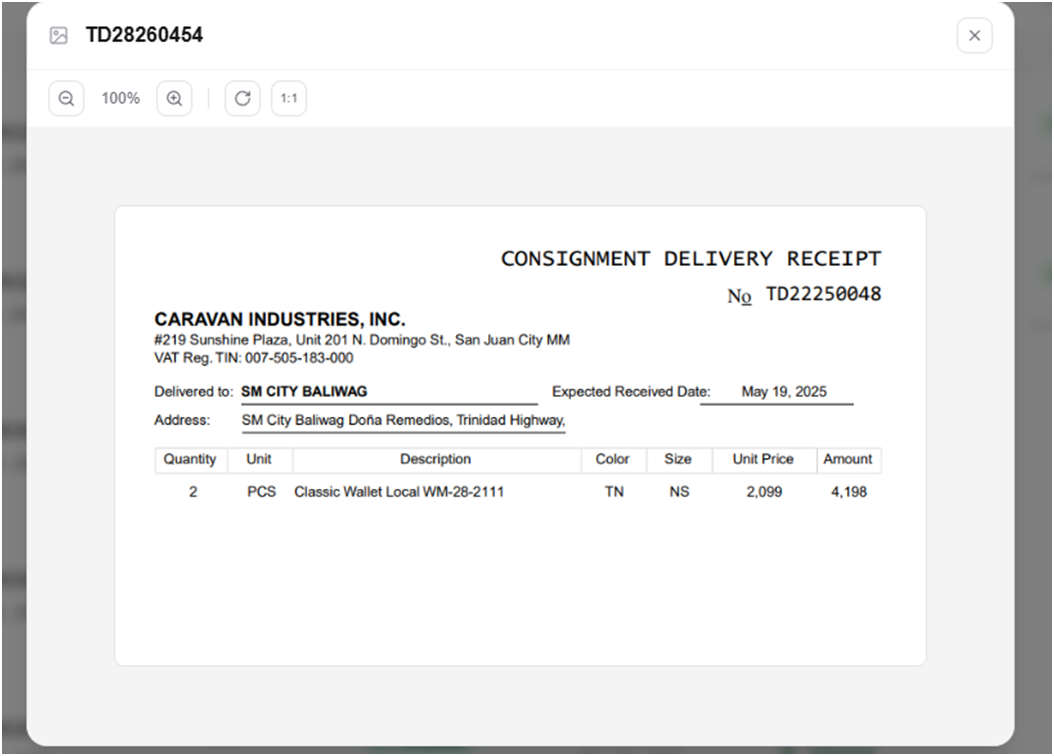
When a TR has attached documents, a file icon appears with the note “Click to view attached documents.” Clicking it opens the document viewer, where you can:
• Switch between multiple files using the tabs or the previous / next arrows.
• Zoom in and out, rotate the image, or reset the view to its original size.
• Drag the image to reposition it when zoomed in.
• Close the viewer with the X button or the Escape key.
Quick Reference
Typical flow
1. Open Transfer Receive; find the delivery that needs a TR (look for a Create TR or notice button).
2. Optionally click View Item to check the items and quantities.
3. Click the button to open the Create TR form.
4. Set the date received, tick the TD(s), and (supervisors) attach a document.
5. Choose Process as TR, or Do not process and give a reason.
6. Click Confirm & proceed and review the confirmation screen.
|
At a glance Notice buttons create TRs too — First / Second / Third Notice open the same Create TR form. Supervisors must attach a document — promos don't have to. Declining needs a reason — choosing “Do not process” requires remarks. |